Smart Arlo video doorbell and chimes are one of the most popular gadgets you can find on the market. Equipped with a host of features like smartphone alerts upon motion detection, live video streaming on your smartphone through the Arlo App, and more, the Arlo video doorbell and chime Installation can serve as the best way to use them. In addition, you can not only see clearly in low light using Night Vision but speak to visitors using the two-way audio as well. You can connect the battery powered arlo video doorbell and chime using a wired connection which makes it even more convenient.
If you have recently purchased a new Arlo Wired Doorbell, and are looking for information on how to set it up, this blog is the right place for you. You will find details on how to proceed with the Arlo video doorbell setup and get done with it in no time.
Requirements for the Arlo video doorbell and chime Installation
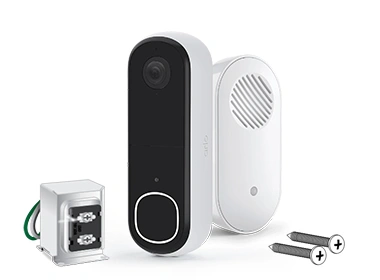
To proceed with the Arlo doorbell installation, you’ll need the following items in hand:
- Arlo Wired Doorbell and Chime
- Power Supply with Voltage between 16V AC and 24V AC
- 10VA Transformer
You’ll also need the Arlo App installed on your smartphone.
Setting Up wireless doorbells arlo video doorbell and chime
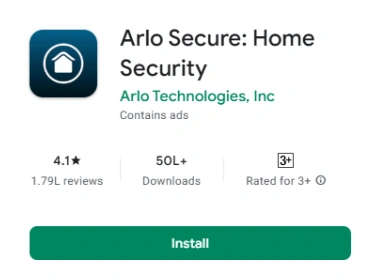
- Download the Arlo app from your device’s App Store or Play Store. Once downloaded, you can create an Arlo account. This will allow you to manage your devices easily. You can also create an Arlo account using the default URL https://my.arlo.com/.
- Once you have done that, you can proceed with installing the Power Kit in the Chime box. The power kit will ensure that the Arlo Video Doorbell is receiving consistent power and is functioning reliably.
- Now, to proceed with the Arlo video doorbell and chime installation, turn off the power from the mains.
- Remove and disconnect the existing doorbell from the point. You can fix a flat mounting plate or use an angled mounting plate. Using the latter will allow you to adjust the field of view for your doorbell.
- Follow the instructions in the Arlo App to make the wired connections and install the doorbell.
- Once done, turn on the main power supply and check the LED on the front panel of the Arlo doorbell.
You can now connect your Arlo video doorbell to the wifi network at your home
Arlo Doorbell WiFi Setup
You can connect your waterproof arlo video doorbell and chime to the WiFi network at your home easily. But first, you’ll need to connect your smartphone to the same wifi network. Make sure you connect it to the 2.4GHz network band.
- Once done, launch the Arlo app and log in to the Arlo account.
- Tap on Settings and then click on the My Devices button.
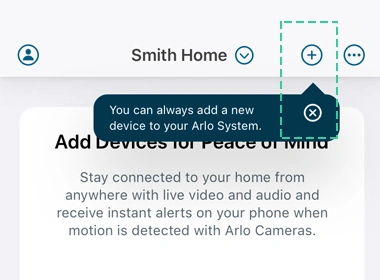
- Now, click on the Add New Device button and then select the security cameras arlo video doorbell and chime option.
- In this window, click on the Video Doorbell option.
- If Arlo detects a SmartHub or BaseStation device, tap on Connect without SmartHub or select Connect without a Base Station option.
- Now, the Arlo app will walk you through the steps to connect the doorbell directly to the 2.4GHz network band.
You have now setup arlo video doorbell and chime for outdoor use. If you need assistance with the arlo video doorbell and chime with night vision, you can read through our blog.
FAQs
My Arlo Video Doorbell and chime is offline. What should I do?
There are complete steps you can follow to ensure that you can fix the Arlo Video Doorbell Offline issue easily:
- Ensure that the doorbell is on and is receiving power properly. Inspect the power cord and ensure it has a proper connection with the DC-IN port on your video doorbell.
- Try changing the power source and wait for the power level to get normal.
- Check the Arlo base station connections and ensure that they are connected using a power cord. You can confirm this by checking the status of the power LED on the base station.
- Move your base station closer to the Arlo Video Doorbell. It should be located within 300ft of the Arlo smart hub or base station. Ensure that there’s no obstruction between the devices. If any, remove the same.
Once the camera is back online, you can complete the Arlo video doorbell and chime Installation process easily.
How does the ambient temperature affect the Arlo video doorbell?
Surveillance devices like your battery powered Arlo video doorbell and chime, can get affected by the ambient temperatures at the location of installation. The recommended usage temperature range is -4°F up to 113°F(which is generally -20°C to 45°C). If the temperature gets out of this range, the normal operational efficiency may be affected.
How do I reset Arlo Video Doorbell and Chime?
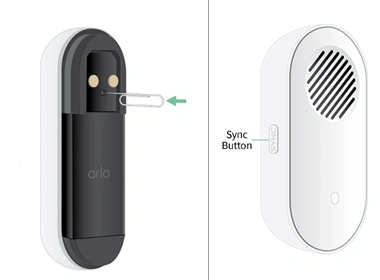
You can easily reset your doorbells & intercoms Arlo video doorbell and chime using the reset button on the doorbell.
Press and hold the RESET button for about 15 seconds using the release pin that comes with your doorbell device.
Release the button once the LED around the doorbell button starts to blink in white color. This means that the reset process has started and you can reconnect it to the Arlo account. The Arlo video doorbell and chime Installation process is easy and you can complete it using the steps discussed in this blog above.